Oil Artisans
  • Home
  • Start Your Journey
  • Oil Artisans Team
  • Recipes/DIY
  • OA Blog
  • Contact

DIY Moisturizing Shaving Cream

10/22/2018

 
Picture
I love vintage, classic, old school things.  One of those is the traditional barber shop.  I take both my sons and sent my husband when he’s willing to our local one, Liberty Barber Shop. The guys there do some great beard shaping, and Crystal makes the boys haircuts quick painless and they look great. Anyways, one of the things they offer at old barber shops is a close shave. You know the one with the brush, lather, and single blade razor and leather sharpening.  Well the closest thing I can give my hubs at home is some Homemade Bergamot & Spruce shaving soap.  This mixture is a cross between lotion & soap and makes for a great shave.

What you’ll need:
  • Double Boiler or Glass bowl on a small sauce pan
  • Hand Mixer or Stand Mixer with Whipping Attachment
  • ⅓ Cup Organic Coconut Oil 
  • ⅓ Cup Shea Butter 
  • 2 tbsp Jojoba Oil  
  • 1tsp Vitamin E  
  • Magnesium Oil 
  • 3-4 Tbsp Castile Soap (Dr Bronner’s is AWESOME, I get it on Amazon) 
  • ​ 2 Tbsp Vegetable Glycerin 
  • 10 drops YL Essential Oils 
  • Glass container (I likethese with glass lids, which I get on yes you guessed it Amazon) 

How To: 
  1. Melt the coconut oil, shea butter, jojoba oil, vitamin E, and 1 Tbsp Castile Soap in a glass bowl double boiler. You can also use a glass jar inside a boiling pot of water though its more difficult.
  2. Place in the fridge to cool.  Only let the mixture cool until it's just hardened through.  
  3. Add the vegetable glycerin, and 3 Tbsp of Castile and use a whipping attachment to beat it for another 30 seconds.
  4. Add the Young Living essential oils and beat another 15 - 20 seconds.  For sensitive or Acne prone skin try adding Melaleuca (Tea Tree) Oil to your scent mix.  Please Please remember not all essential oils are made equal and not all can be used topically.  Young Living oils are the highest therapeutic grade and they even have a line that is safe enough for babies and kids and others can be ingested.  To learn more about their Seed to Seal process you can check out our Essential Oils 101 blog. 
  5. Optional: If you like it a little more foamy add another Tbsp of Castile Soap.  Finish whipping until there are stiff peaks, then store in a glass container in a cool place. Due to the fact that coconut oil is solid at room temp during hot months (in warmer climates) use a 1:3 coconut to Shea or mango butter.

​Note: The lather on this isn't as soapy as shaving gel, but it feels great and with an old fashion brush like this one, my hubby says it is the best! 

DIY Whipped Body Butter

10/22/2018

 
Picture
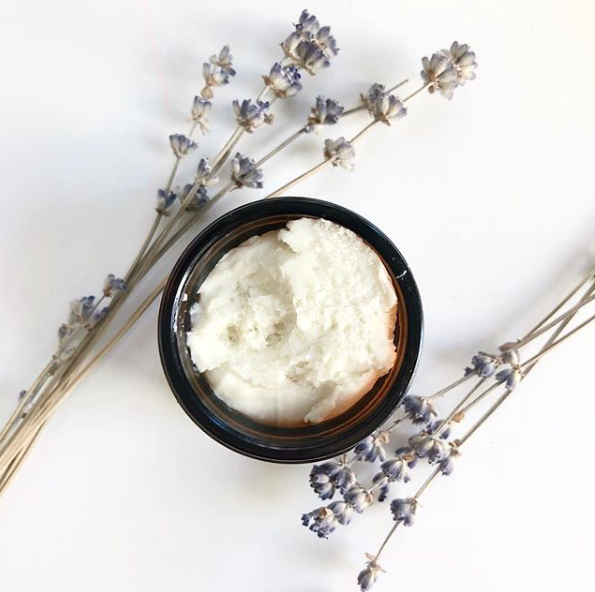
In am in a continuous battle with pain and pain induced insomnia.  Here's a little back story to why:  I was a competitive gymnast for many years and during that time I pushed the limits of my body as many athletes do.  Unfortunately for me, I also had a condition which caused more laxity in my joints than normal.  Basically my joints stretched further and it put more stress on the ligaments, tendons, muscles, and cartilage in my joints.  Add to that the many injuries and surgeries to fix them. No big deal for a teenager, but now I feel 20-30 years older than I am and I have the pain to go along with it.

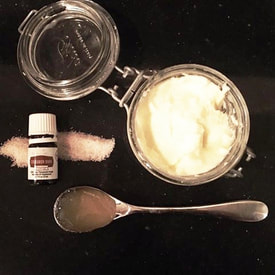
Thank goodness for this amazing whipped body butter turned Aches & Joint Support cream, then sleep cream, and even beauty cream and energizing lotion.  Yup it's amazingly versatile!!  

What you need:
  • 4 oz glass Jar
  • Double Boiler or a glass bowl over a small sauce pan will do
  • Hand Mixer or Standing Mixer
  • ½ cup organic coconut oil
  • ½ cup Shea butter (I get the solid block form on Amazon)
  • 1 tsp Jojoba or Avocado (for Aches & Joint support & adult sleep cream add 1 tbsp Magnesium Oil instead)
  • 1 tsp vitamin E
  • Young Living Essential Oils (different depending on need - see recipes below)

How To: 
  1. Bring all these to a boil in a glass bowl double boiler. You could also use a jar in boiling water.
  2. Place in the fridge to cool.  Only let the mixture cool until it's just hardened through.  
  3. Then use a whipping attachment to beat it for 30 seconds. Add the Young Living essential oils to suit your needs.  
  4. Finish whipping until there are stiff peaks, then store in a glass container in a cool place. Due to the fact that coconut oil is solid at room temp during hot months (in warmer climates) use a 1:3 coconut to Shea/mango butter ratio.
  5. Young Living Essential Oils.  Please Please remember not all essential oils are made equal and not all can be used topically.  To learn more click see our Essential Oils 101 Blog about why Young Living oils are the highest therapeutic grade and they even have a line that is safe enough for babies and kids and others can be ingested.  
  6. When adding the oils in any cream made for children, please check the recommendations for oil safety or use the Young Living KidScents line. Also don't add magnesium oil for children, it can reduce respiration rates and isn't safe for kids under 8 years old.  

Recipes that I like to use: 

Aches & Joint Support: (with the Magnesium Oil variation)
10 drops Panaway (starter kit)
8 drops Peppermint (starter kit)
4 drops Lemongrass
4 drops Copaiba (starter kit)
3 drops Wintergreen
3 drops Frankincense (starter kit)

Sleep: (used on feet & neck with the Magnesium Oil variation when it's for adults)
14 drops Lavender (starter kit)
10 drops Cedarwood
5 drops Valor (when available seasonally)

Beauty:
10 drops Frankincense (starter kit)
8 drops Melaleuca (aka Tea Tree)

Energizing Lotion:
12 drops Grapefruit
8 drops Bergamot

Beat the Yuck: (used on feet)
12 Drops Lemon (starter kit) 
6 Drops Frankincense (starter kit)
12 Drops Thieves (starter kit)
6 drops Melaleuca (aka Tea Tree)
12 Drops Oregano

Chest Rub & Runny Nose: (used like vapor rub on chest & feet)
10 Drops Peppermint (starter kit)
8 Drops Lemon (starter kit)
10 Drops R.C. (starter kit)
6 Drops Eucalyptus Radiata

Baby Sleepytime Lotion
10 drops Gentle Baby
5 Drops Lavender (starter kit)


If after reading this you want to get your own Young Living oils, because who wouldn't they are amazing!  All you need to do is become a wholesale member by ordering a Premium starter kit?  The kit comes with 11 Oils, a diffuser for aromatherapy, sample of Thieves Cleaner, Samples of Ningxia Red, and much more all for almost 50% off the normal price.  I've never heard anyone say they wished they hadn't bought the whole kit.

Not ready for a Starter Kit yet, you can order just a few oils with no obligation to order more as a retail customer.  All you need to do is click here, sign up as a young living customer, and shop at your leisure. 

Lip Balm & Oily Sticks

10/22/2018

 
Picture
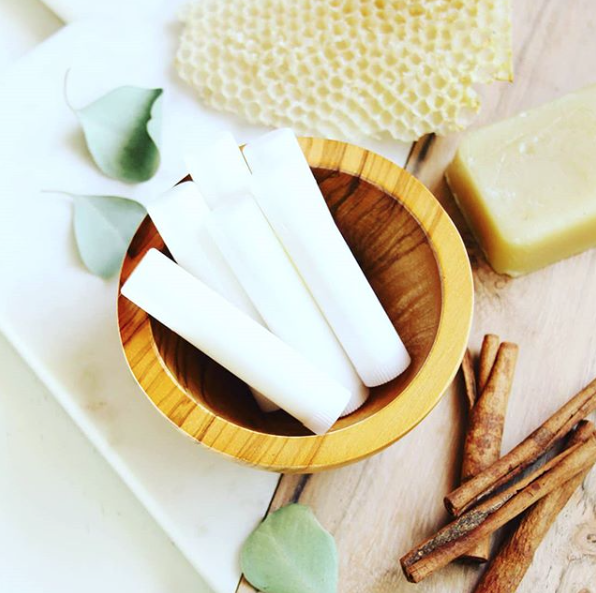
I love how versatile these little lip balm tubes can be!!  Of course, I can make cute lip balms for myself and the kids, but I can also use them to make my favorite oil combinations into easy to carry sticks.  For those of you who don't love & use essential oils like we do, they have incredible wellness benefits and are all natural so we often use them to replace some of the medicines in our cabinet.  We make bug bite relief sticks, and skin soothing lotion sticks, chill out sticks with calming oils for the kids, sleepy sticks, and my favorite calm & gentle baby stick.  

All those are great uses for these little tubes. So here is how I make the base for lip balms and Oil Sticks. 

What You'll Need:
  • Lip Balm Tubes or mini tins
  • A double boiler or bowl over boiling water melt the ingredients
  • 1 Tbsp Beeswax (I prefer the pellets and get them here on Amazon)
  • 1 Tbsp Coconut Oil (like this one)
  • 1 Tbsp Shea Butter (this is my favorite)
  • 1/4 tsp Vitamin E (this is the one I get)
  • ​Young Living Essential Oils of your Choice

How To:
  1. In the double boiler over medium heat melt all the ingredients EXCEPT the Young Living Essential Oils
  2. Remove from heat and let cool slightly.   I like to make this as a base to store so I pour it into a jar.
  3. Pour a few tablespoons of the liquid mixture (if it gets cool you can microwave before the oils are added) into a small glass bowl 
  4. Add the 2-4 drops Young Living Essential Oils of your choice to the mixture.  You'll hear me say it over and over, not all Essential Oils are created equal.  You are putting this in a balm that gets absorbed by your body, near your mouth!  Please know that so many oils that are labeled "pure" are actually only around 10% therapeutic grade oil and the rest is filler. Young Living is always 100% therapeutic grade oils and they are tested and retested to ensure quality and purity.  Plus they have the Seed to Seal guarantee and are the only company FDA approved to have oils that can be ingested.  Don't buy crappy Essential Oils online or at your corner store, buy the best oils on the market they go into your body.  If you'd like to learn check out the Essential Oils 101 Blog.
  5. Then pour or I like to use a pipet or mini metal funnel to fill the tubes or tins.
  6. Set them upright to cool and harden and then label them and they are good to go.


Picture

Flavored Butters

10/22/2018

 
Picture
  Did you know that Young Living has an entire line of Vitality oils designed to be used in cooking?  Yup, you can ingest these oils and they add amazing flavors and health benefits to your food.  Infusing oils into butters, oils, and vinegars is such an easy option to pack a flavor punch, just keep in mind oils are concentrated so a little goes a long way, more so with some than others.  There is a handy guide at the bottom to help.  But onto the star of this blog, flavored butters!

  A flavored butter is so versatile, it can be used as is, garnish a savory dish, or in the case of this cinnamon butter add amazing flavor and healthy benefits to my morning oatmeal!  

  What you need:
  • a 4 oz glass jar with highly sealing lid
  • 4 oz of good butter (I like Kerry Gold butter - or make your own)
  • 1-2 Tablespoons Local Organic Honey (This is to taste so add as you desire)
  • 1 drop Young Living Vitality Cinnamon Bark Essential Oil 
  • Mini Spatula or something to stir 

  How to: 
  1. Place the room temperature butter in a small mixing bowl or in the jar.
  2. Add 1 drop of Cinnamon Bark Vitality Essential Oil and stir
  3. Add 1-2 Tablespoons of Local Organic Honey to taste 
  4.  Stir to ensure its combined, place in jar if you did not make it inside said jar, and enjoy.  Store butter as you usually would and add a spoonful when you want to take the flavors up a notch. 

  Other options for butters that we like to make are citrus butters with Lemon Vitality, Orange Vitality, or Grapefruit Vitality Essential Oils.  I love to make an herb butters to flavor chicken, turkey or fish.  Let us know what you have tried in the comments! 

  If you loved this idea of infusing, keep an eye out in November. We will be posting our Holidays Cooking with Essential Oils to share all our recipes tips and tricks.  


Picture

Lavender Sugar Scrub

10/22/2018

 
Picture
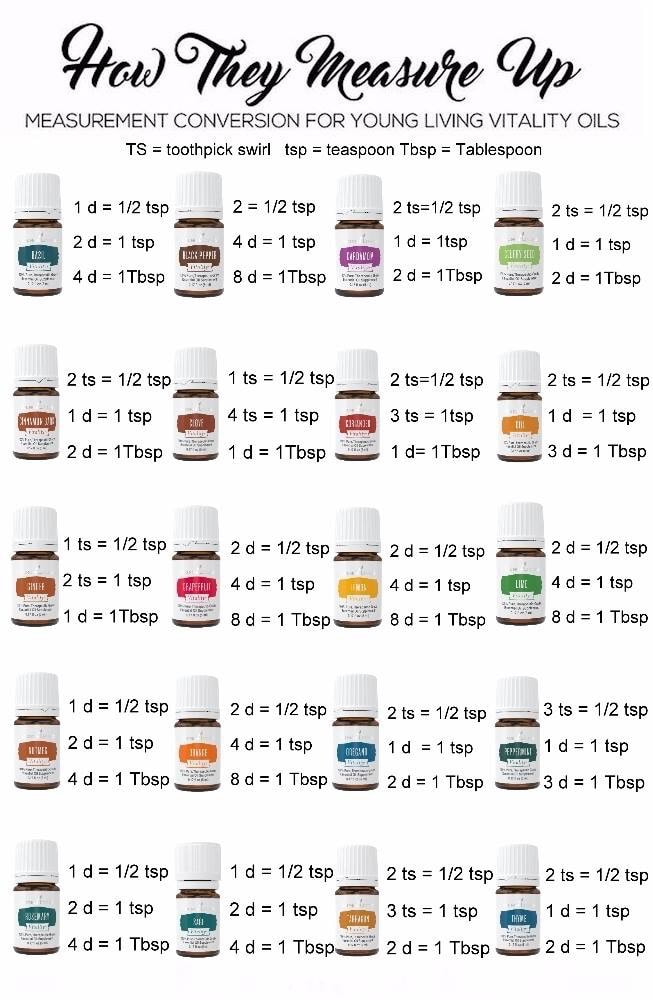
Sugar Scrubs are an essential for dry hands, and you'll find them in our home all year long.  They help to remove dead skin and they infuse moisture and all the oily benefits they have infused in them in to your hands.  This Lavender Sugar Scrub is an all year favorite.  

The other reason to use sugar scrubs in because they are so simple to make and enjoy, and as a bonus with this make in the jar scrub there is little clean up!

What you need:
  • 4oz glass jar with lid
  • 6 Tablespoons (or 3oz) Organic Coconut Oil 
  • 2 Tablespoons Sugar (I like Organic Unrefined)
  • 10 Drops Young Living Lavender Essential Oil
  • *Optional - 1 Tablespoon Dried Organic Lavender 
  • Mini Spatula, popsicle stick or small spoon

How to:
  1. Place 6 tablespoons or approximately 3 oz of organic coconut oil in the jar (if its cool stir until nicely whipped or heat slightly until soft)
  2. Add the 2 Tablespoons of Sugar - if you have very sensitive skin use fine sugar, but I like organic unrefined sugar for this recipe
  3. Stir the coconut oil and sugar until fully combined
  4. Add the 10 drops of Young Living Lavender Essential Oil - Remember not all oils are created equal, many have synthetic chemical properties and no one needs any more toxins!!  If you want to know more check out our Essential Oils 101 blog and learn about the Seed to Seal guarantee and Young Living's high quality standards.
  5. Last add the optional dried lavender, this is a nice touch to show people what is in it.  If I'm making other types of sugar scrubs, like a Citrus scrub I might add dried orange rind, or a mint scrub using dried mint.  You get the picture, its not necessary, but I like the added touch.
  6. Give it a final stir to combine everything, seal the jar and enjoy.  Remember though Young Living Essential Oils do not expire, the coconut oil does.  I recommend using the sugar scrub within a year.

    Author

    Write something about yourself. No need to be fancy, just an overview.

    Archives

    May 2020
    March 2020
    January 2019
    November 2018
    October 2018

    Categories

    All

    RSS Feed

Proudly powered by Weebly
  • Home
  • Start Your Journey
  • Oil Artisans Team
  • Recipes/DIY
  • OA Blog
  • Contact